 Contact us
 How to Create a Custom Business Object with Automatically Generated ID and Checks in SAP Marketing Cloud?
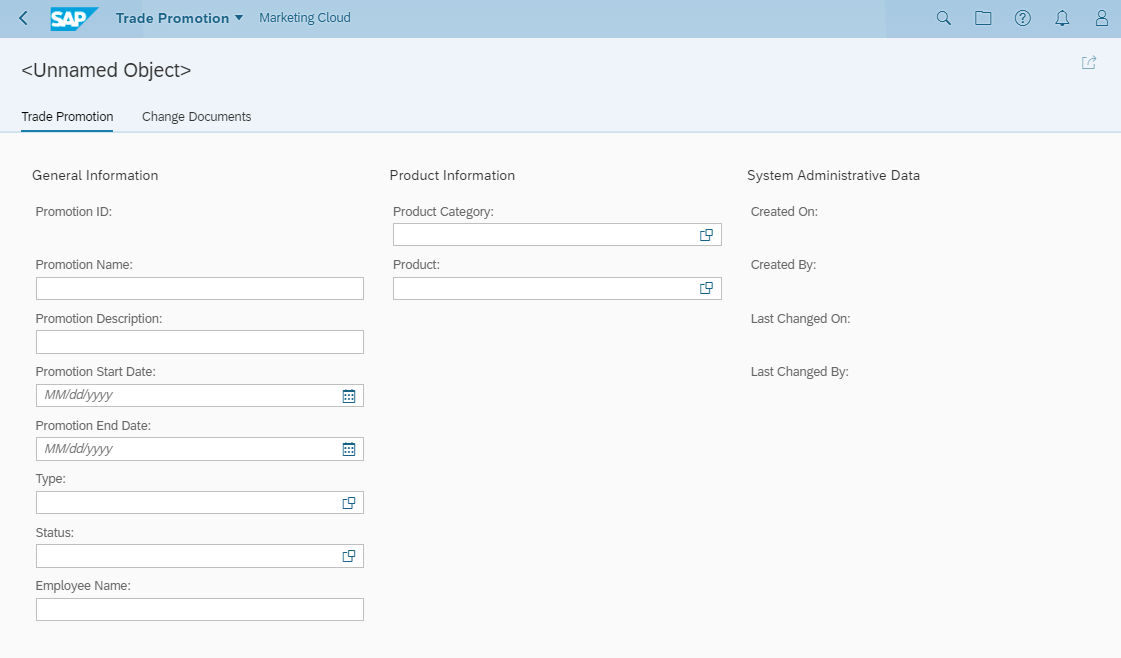
SAP Marketing Cloud does not offer many possibilities in the custom Business object settings in comparison to its previous on-premise solutions. If you wanted to have an automatically generated ID or required field accuracy check, you would normally need help from a developer.
But it is a simple process, and with this straight forward guide, we will show you how you can:
- Create a custom business object with a stand-alone application for managing those objects
- Fill the object with fields you want it to contain
- Have the system automatically generate ID based on a specific template
- Have the system automatically fill the name of the employee that created the custom object
- Set the necessary accuracy checks on the date and other required fields with error messages
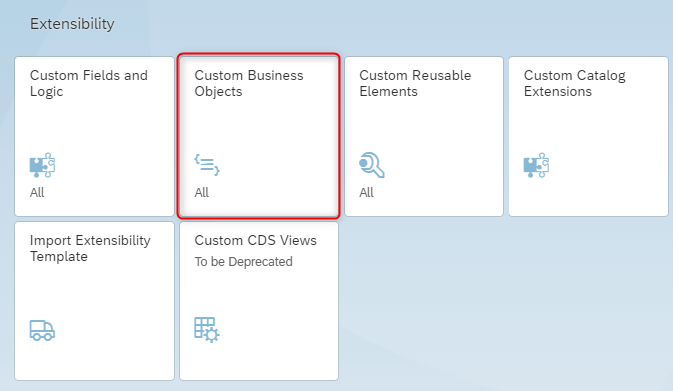
- Begin with the basic creation of the custom business object. Open the Custom Business Objects app in the Extensibility group.

- Create a new object by clicking on NEW (on the right upper side of the window).

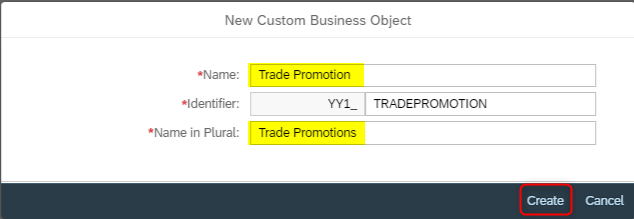
- Define the Name. Other fields will fill automatically, but you can change them. Click on the Create button.

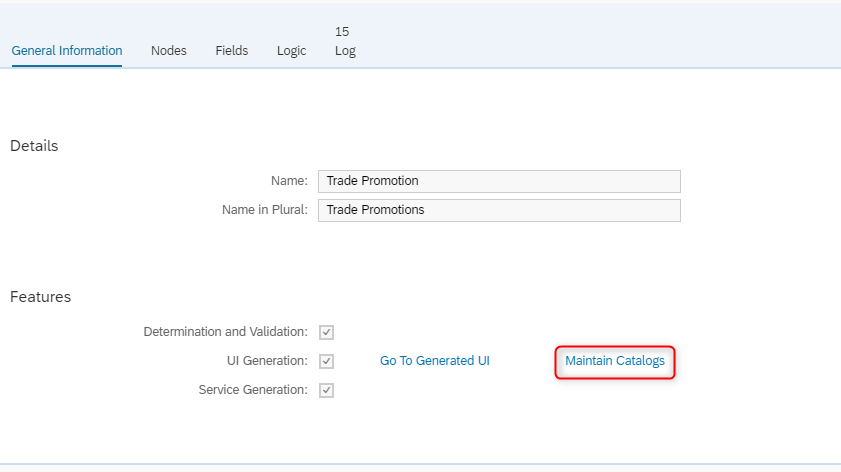
- A new window with a General Information tab will open. Depending on your requirements, you can tick these checkboxes:
- Determination and Validation – enables you to implement custom logic.
- UI Generation – generating User Interface for running application to manage your object
- Service Generation – creating an OData that enables the upload of data
- Can Be Associated – enables the association of object to a custom field
- System Administrative Data – automatically creates administrative fields (Created On, Created By, Changed On, Changed By)
- Change Documents – automatic logs about changes of the object.
- Data Access Management – providing security features relevant to data protection.
Note: for this purpose, we tick the first six checkboxes.
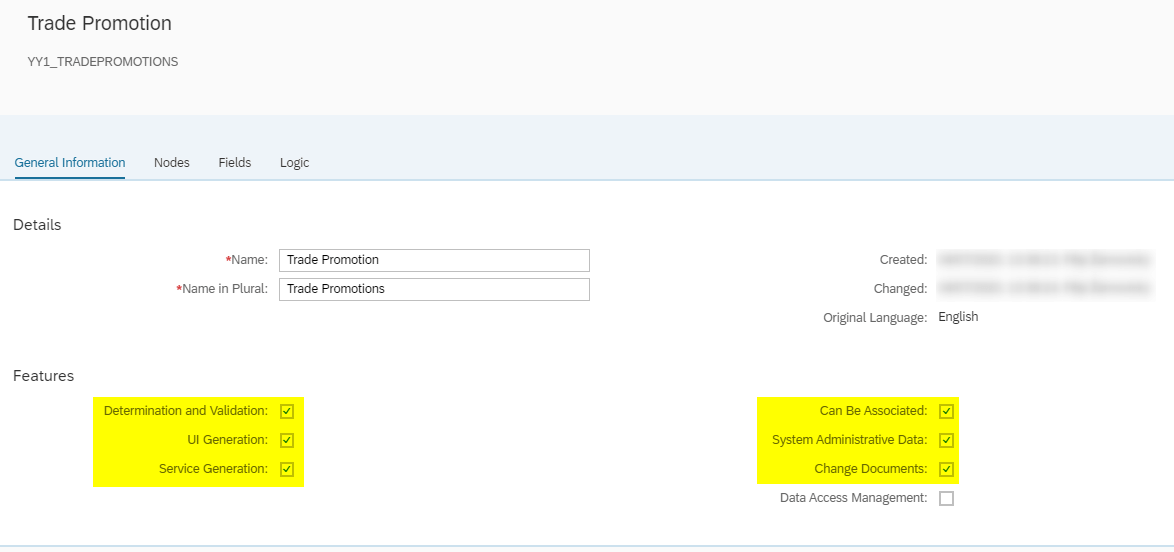
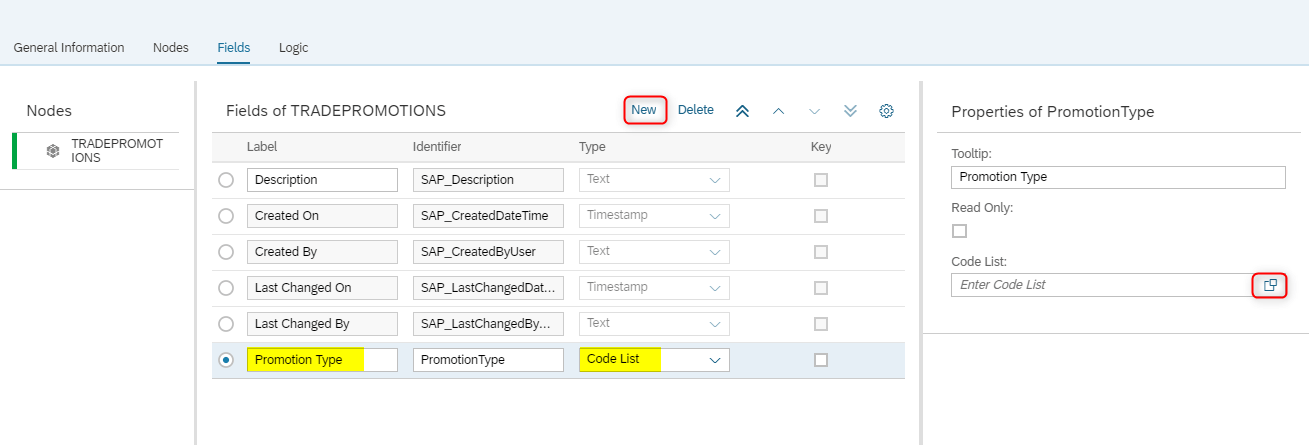
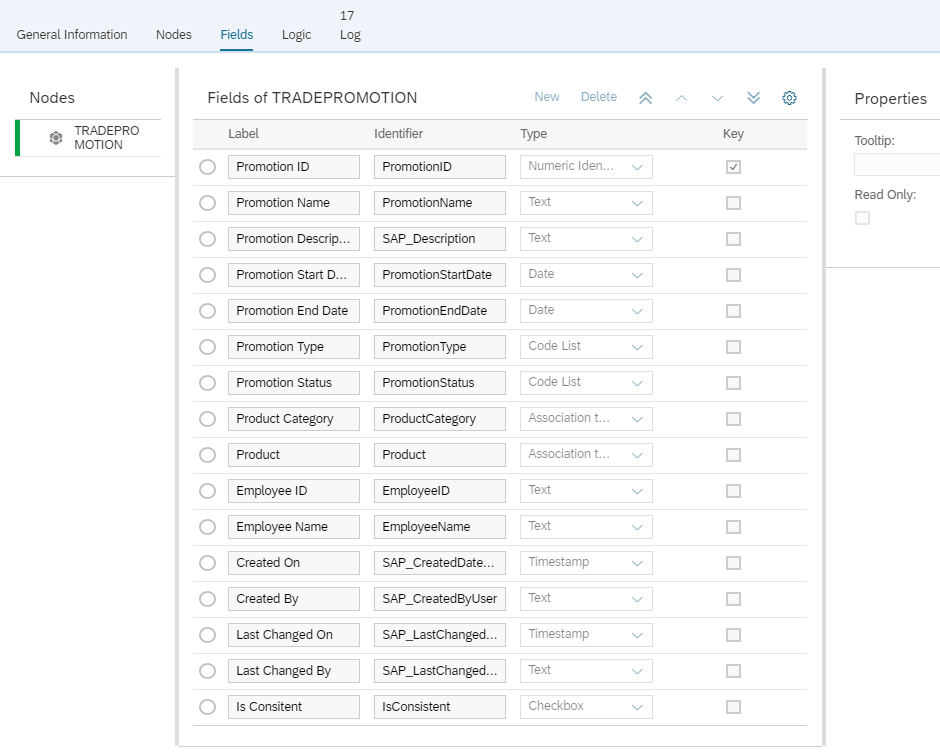
- Go to the Fields tab. The system automatically created essential Labels. You can add new labels by clicking the button New. Fill the Name and Type. Most of the Labels don’t require additional settings except for the Code List type. For this type, you need to create a specific list of selection options. You might want to check the steps here.

- When choosing the Code List, only the ones with the status Published are visible. Choose the one you need.

- This way, you can fill all the Labels you want to use in the object.
!!!For Accuracy check, you need to create a checkbox type field Is Consistent.
- Before continuing with creating the ID Generator, you will be notified to publish the object first.

- You do it by clicking the button Publish in the lower right corner.

- Go back to the newly created and published object on the Logic tab. You can see the status of the object in the upper right part of the window. Custom Logic creation contains two parts:
- After Modification
- Before Save
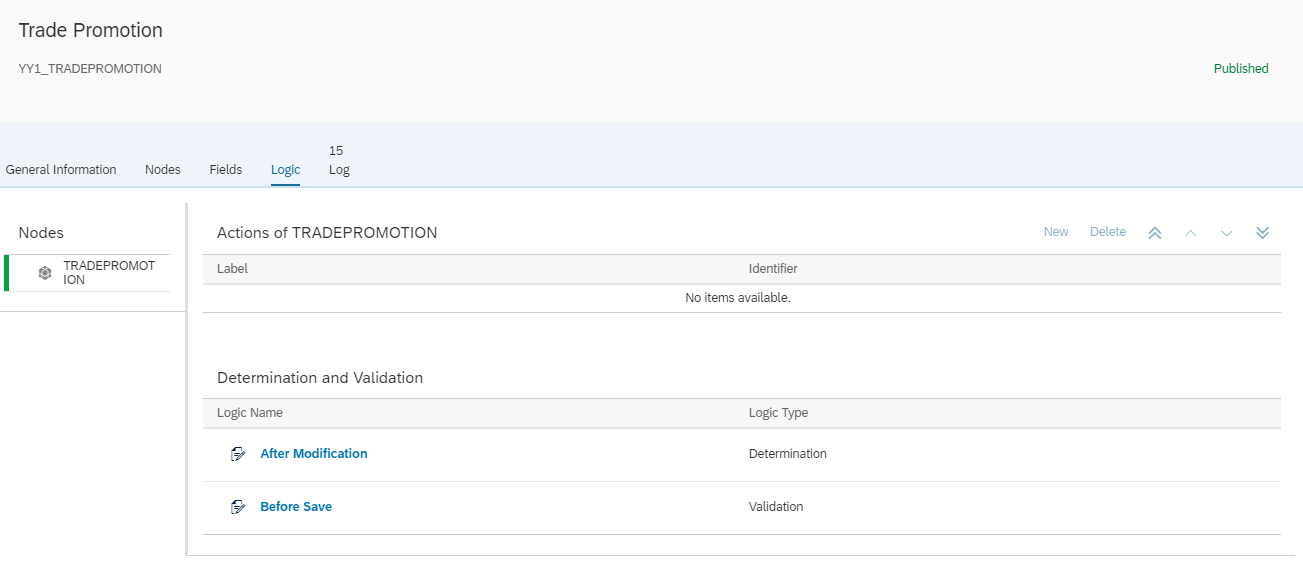
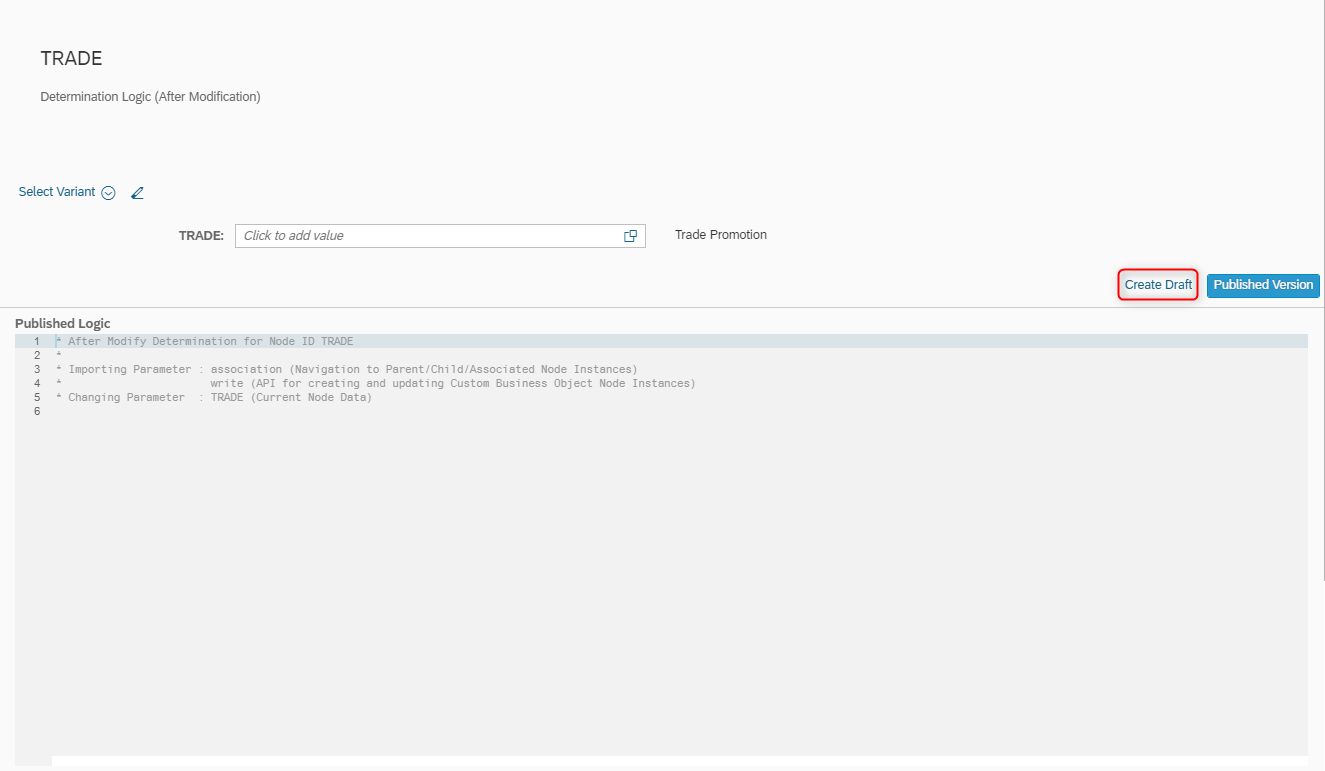
Start with the After Modification, where you define the main part of the code.
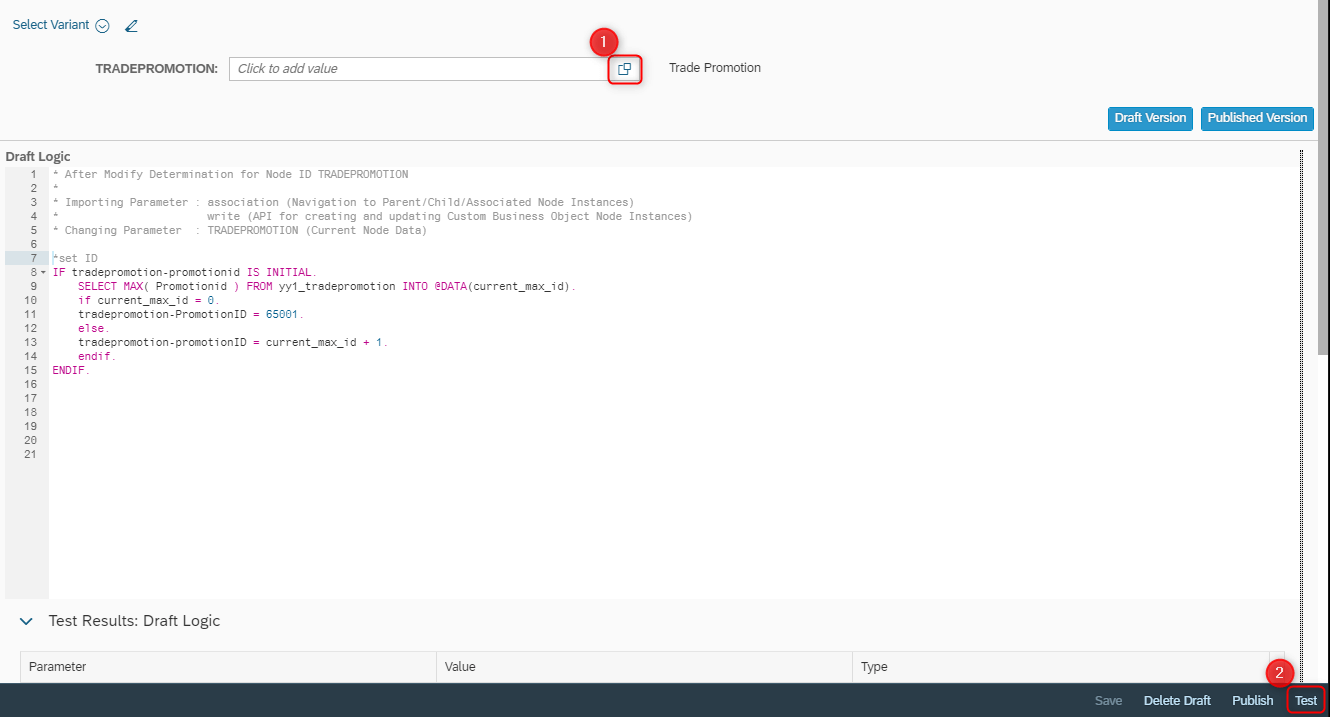
- A Draft Logic window appears, where you can write the code. In the picture, there is an example of the code that generates object ID in the format 6500x. You can change the format if you wish.
Note: this code is set to a numeric format – no letters, only digits.
Highlighted parts of the code contain the name of the objects and fields that you defined in step 7. Change those parts to suit your needs.
HINT: when you start writing the name of the field/object press CTRL+SPACE and the list of all available fields appears, then choose your ID.
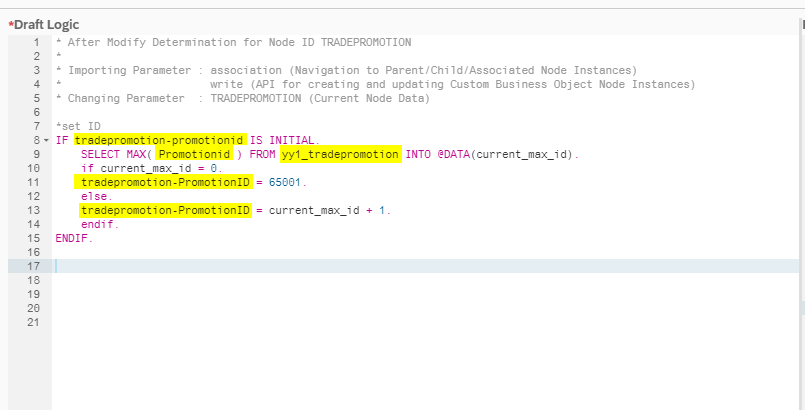
Code for ID generating:
*set ID
IF tradepromotion-promotionid IS INITIAL.
SELECT MAX( Promotionid ) FROM yy1_tradepromotion INTO @DATA(current_max_id).
if current_max_id = 0.
tradepromotion-PromotionID = 65001.
else.
tradepromotion-promotionID = current_max_id + 1.
endif.
ENDIF.
- If you have a syntax error, the system will alert you with an error message pointing to the row.
- You can test the created code. Clicking the Click to add value button (1), you see the list of all created fields that you can add to the test scenario. Then click the Test button on the bottom (2).

- Check the result of the test in the Test Results window. If you see the ID filled, the code worked.

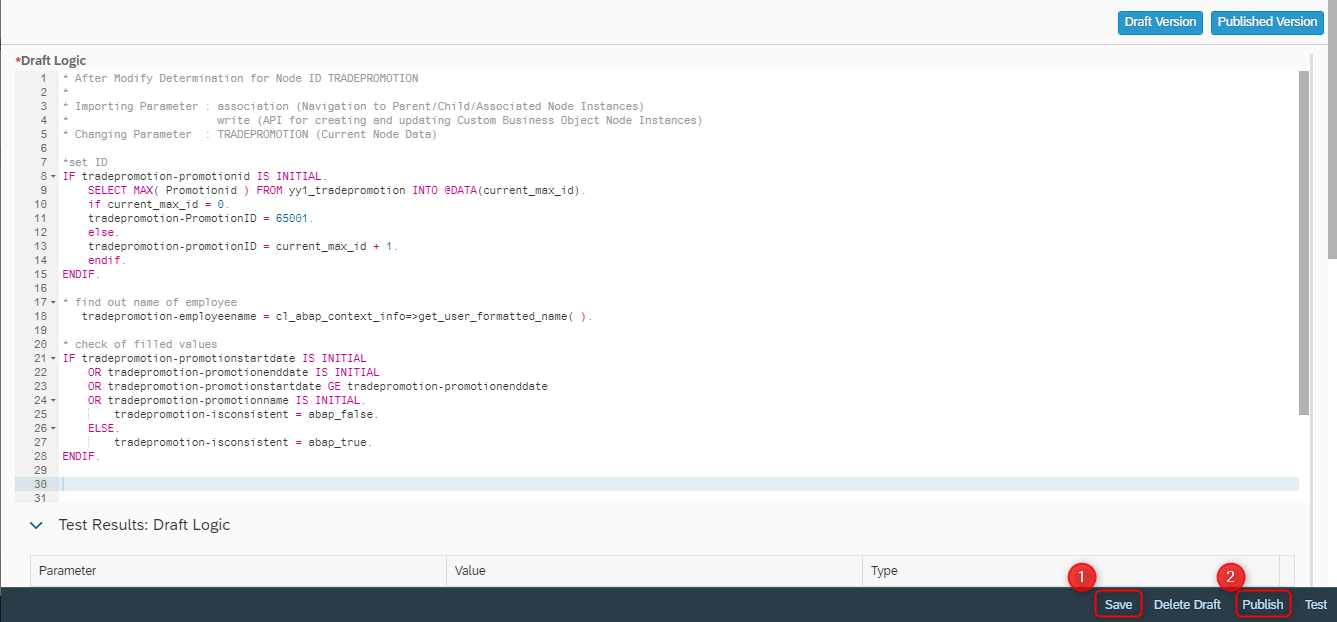
- Repeat the same steps to add code for automatically filling the employee and checks of the required fields: Start Date, End Date, Name is the End Date greater than Start Date.
Note: Is Consistent field is used as an auxiliary field to pass the checks from After Modification logical part to Before Save part.
* find out name of employee
tradepromotion-employeename = cl_abap_context_info=>get_user_formatted_name( ).
* check of filled values
IF tradepromotion-promotionstartdate IS INITIAL
OR tradepromotion-promotionenddate IS INITIAL
OR tradepromotion-promotionstartdate GE tradepromotion-promotionenddate
OR tradepromotion-promotionname IS INITIAL
tradepromotion-isconsistent = abap_false.
ELSE.
tradepromotion-isconsistent = abap_true.
ENDIF.
- Test, save and publish the final code.

- Go to Before Save part.

- Insert the code deciding on saving based on checks from the After Validation part. When modifying the code, follow the instruction in step 11.
Note: Skip this step, if you didn’t add the checks in the After Modification part.
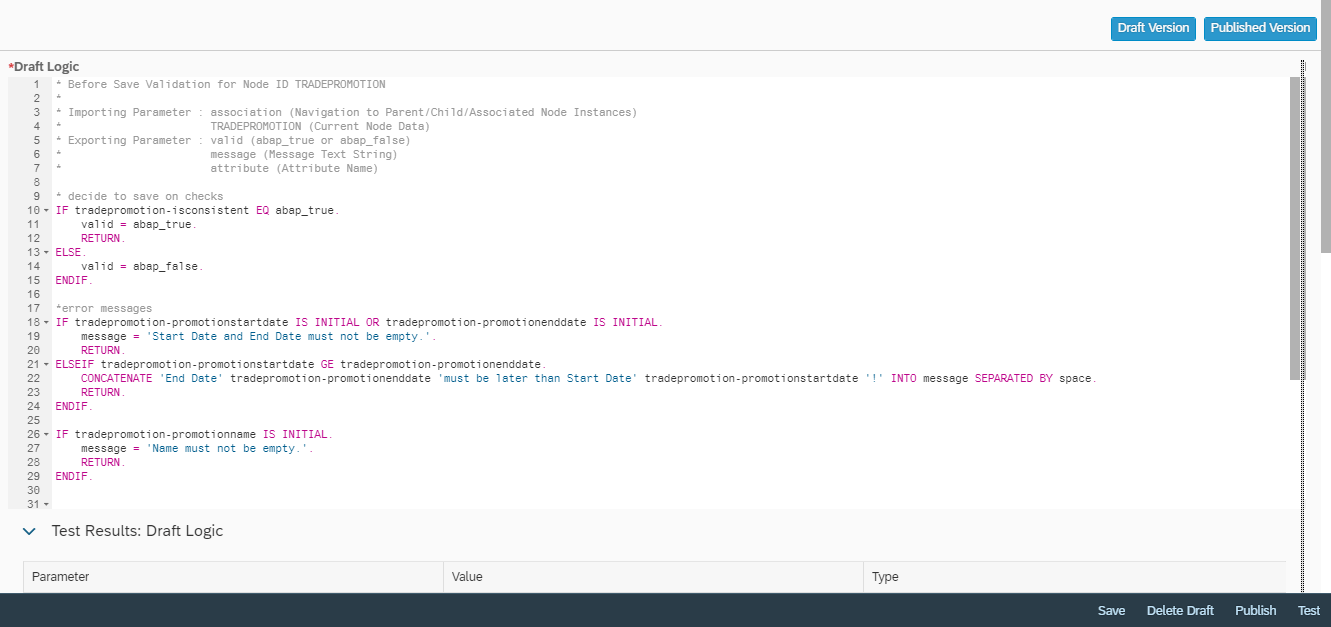
Code to insert to Before Save part:
* decide to save on checks
IF tradepromotion-isconsistent EQ abap_true.
valid = abap_true.
RETURN.
ELSE.
valid = abap_false.
ENDIF.
*error messages
IF tradepromotion-promotionstartdate IS INITIAL OR tradepromotion-promotionenddate IS INITIAL.
message = ‘Start Date and End Date must not be empty.’.
RETURN.
ELSEIF tradepromotion-promotionstartdate GE tradepromotion-promotionenddate.
CONCATENATE ‘End Date’ tradepromotion-promotionenddate ‘must be later than Start Date’ tradepromotion-promotionstartdate ‘!’ INTO message SEPARATED BY space.
RETURN.
ENDIF.
IF tradepromotion-promotionname IS INITIAL.
message = ‘Name must not be empty.’.
RETURN.
ENDIF.
- In case you ticked the UI Generation option (step 4.), a stand-alone application for creating your custom object will be created. Use the hyperlink Maintain Catalogs to define, in which catalog and group of applications your custom app shows.

- If you followed all the instructions right, on the home page you find your custom app for creating your custom objects.

